

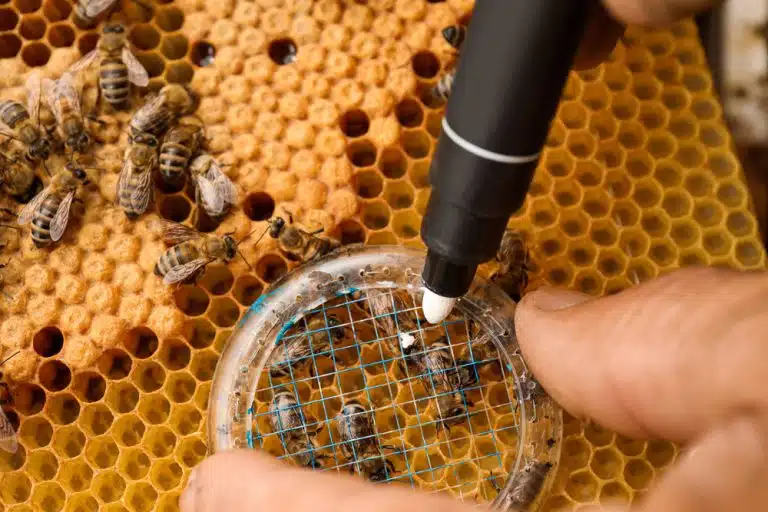
To mark a queen bee, you immobilise her, put a dot of paint on the centre of her thorax in the colour for her year of birth, and wait for it to dry before returning her to the frame. The two usual mistakes are squeezing her while holding her and letting out too big a drop. Queens born in 2026 are marked white and those born in 2027, yellow.
Equipment for this task
 Queen Marking pen POSCA®
 Queen marking cage with plunger and side entry
 Fluorescent Queen Marking Kit – Numbered Opalitki (1–100)
To mark a queen you need paint and something to hold her. The plunger marking cage does not include the pen, and the disc kit does not include a cage.
Practise on drones first
- Mark five or six drones before you touch a queen: they handle the same way and don't sting.
- Prime the pen on a piece of paper until the line comes out fine.
This guide covers what the mark is for, which colour goes with each year, when to mark, what equipment you need and the step-by-step method with a plunger cage, on the frame or with your fingers. The technique mainly follows Gilles Fert’s book Cría de reinas.
| At a glance | |
|---|---|
| Which colour | The colour for her year of birth: 2026, white; 2027, yellow |
| When | Once the queen is laying, not newly emerged |
| Where | A small dot on the centre of the thorax |
| With what | A queen marking pen or marking paint and a cage to hold her |
| Before releasing her | Dry paint: from one to a few minutes |
Why mark a queen bee
A marked queen saves you time at every inspection and tells you things you can’t see any other way:
- You find her sooner. A dot of colour stands out from a metre away among thousands of workers, all the more so with a dark bee such as the Iberian or the European dark bee. Even so, many inspections don’t require you to see her: we cover that in how to find the queen bee and when you don’t need to.
- You know her age at a glance. The colour shows the year she was born, and with that you decide whether it’s time to plan requeening.
- You spot a possible change of queen. If you open the hive and find an unmarked queen, or one with a different colour from the one you applied, the colony has most likely replaced its queen on its own, by supersedure or after swarming. As paint can also wear off, note it down as a possible replacement and check it against your hive records.
- With a numbered disc, you identify each queen. The number links her to your records: which mother she comes from and how she has performed. That’s what you need if you choose breeder colonies for rearing.

The mark has its limits: it wears, and sometimes it comes off altogether. It tells you when the queen was born and nothing more; it says nothing about her quality, her breed or her mating. Her age is established by your colony records, and the colour reminds you of it in the apiary.
Which colour: the queen bee colour code by year
You don’t choose the colour. An international code assigns one to each year according to its last digit, and the cycle repeats every five years:
| Colour | Years ending in | Coming years |
|---|---|---|
| White | 1 and 6 | 2026, 2031 |
| Yellow | 2 and 7 | 2027, 2032 |
| Red | 3 and 8 | 2028, 2033 |
| Green | 4 and 9 | 2029, 2034 |
| Blue | 5 and 0 | 2030, 2035 |
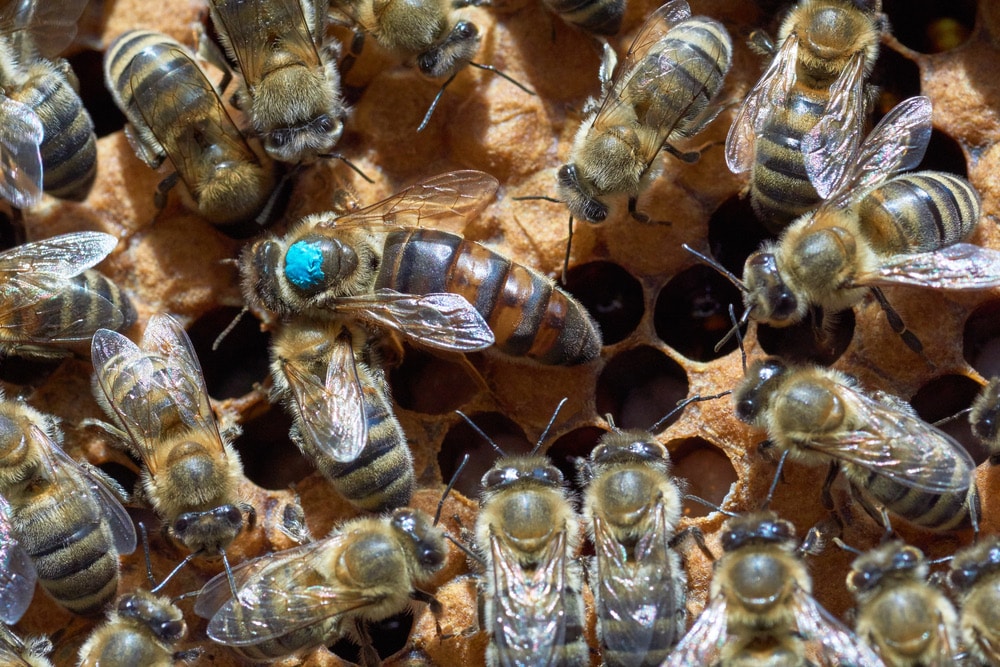
How to tell a queen’s year from her colour
Look at the colour and count back to the most recent year it matches. A queen with a white dot seen in 2028 was born in 2026 and is in her third season. As the cycle lasts five years and queens are usually replaced well before that, in practice there’s no confusion.
Because the code is international, a queen bought in France or Germany reads the same as one raised in your own apiary. And if the mark wears off and has to be redone, use the colour of her year of birth, not the current year’s. More on her life cycle in the queen bee: what she does and how long she lives.
When to mark the queen
Mark her once she is laying and you have checked that her laying is good. In a professional rearing calendar, marking comes with the laying check, about 25 days after grafting, just before the mated queen is caged.

It’s best not to mark virgins as they emerge, even though that is the convenient thing to do with an incubator. During mating they lose much of the hair on the thorax, which is what the paint grips, and the mark usually disappears on the mating flights. What’s more, a marked virgin is more likely to be rejected on introduction. We explain this in queen cell, virgin queen or mated queen.
Waiting until she is laying has another advantage: you don’t mark queens you won’t end up keeping. The figures of a professional breeder such as Gilles Fert illustrate it: around 12% of queens don’t return from the mating flight, and of those that lay, an average of 10-15% per season are culled for irregular brood or abnormal appearance.
If the queen is already in a production hive, pick a time when the colony is small: in the nuc, or coming out of winter, it’s much easier to find her and work calmly than in the middle of a honey flow with the box full. Do it on a mild day, with no wind and no robbing, because the hive will be open for a few minutes, and work in the shade while you are holding the queen.
What you need to mark a queen
You need two things: something to paint with and something to hold her with.
The paint
- Marking pen. The POSCA marking pen uses water-based paint and has a 2.5 mm tip. It’s quick and clean, but you have to prime it on a piece of paper first.
- Marking paint with brush. Queen marking paint comes in a small bottle with the brush in the cap. You apply it with a single touch and it takes a little longer to dry.
Most quick-drying paints will do, as long as they don’t bother the queen. If you’re using one for the first time, try it on a few workers first.
Holding the queen
| Tool | How it holds her | Best for |
|---|---|---|
| Queen marking tube with plunger | The queen goes into the tube and the plunger brings her up to a mesh. You mark through the gaps. | Beginners. It’s the safest option. |
| Plunger marking cage with side entrance | The same, but the queen walks in from the frame through a side opening. | Anyone who doesn’t want to pick her up to put her in the tube. |
| Push-in marking cage | A grid holds her still against the comb, without taking her out of the hive. | Anyone who prefers not to lift her off the frame. |
| Queen catcher clip | It picks her up from the frame without squeezing her; the workers leave through the slots. | An extra for transferring her to the plunger cage. |
If you’re starting out, two things are enough: the marking pen in the colour of the year and the plunger marking cage with side entrance, which the queen walks into from the frame, so you don’t have to pick her up with your fingers. The rest is in queen marking equipment.
How to mark a queen bee without harming her, step by step
- Get everything ready before you open the hive. Cage, paint in the colour of the year and a piece of paper. Shake the pen and press it against the paper until the paint flows fine and even.
- Find the queen using little smoke, so she doesn’t run for the hive walls, and set her frame aside. Work over the open hive and keep low, so that if she falls she falls inside.
- Immobilise her with the cage or with your fingers, as explained below. Use just enough pressure to stop her moving.
- Put a small dot on the centre of the thorax. Rest the tip on her without pressing: if you press, the pen’s valve releases a squirt.
- Let the paint dry with the queen still held and in the shade, easing the pressure a little. With a water-based pen, one to a few minutes is enough; marking paint needs a little longer.
- Return her to the same frame, among her own bees, and watch her for a few seconds: she should walk normally and the workers shouldn’t harass her.
- Write down the date, the colour and, if you use a disc, the number.
If it’s your first time, practise on drones first. They handle the same way, they don’t sting and it doesn’t matter if the dot ends up off-centre. Five or six are enough to get a feel for the cage and the paint. Use a different colour from the year’s on them, so you don’t get confused later. And there’s no need to anaesthetise the queen to mark her: the cage is enough.
How to hold the queen to apply the mark
With a plunger cage. Put the queen in the tube and raise the plunger slowly until she is just behind the mesh, with her thorax showing through one of the gaps. Don’t press on her abdomen or legs. If she looks twisted or is struggling, lower the plunger and reposition her. Any workers that went in with her leave by themselves through the mesh.
On the frame, with the push-in cage. Lower the grid over the queen until it touches the comb, without digging it in, and do it over cells, not over the wood of the frame. This model has no stop, so the pressure is up to you. You mark, wait for the paint to dry and release her on the same spot.
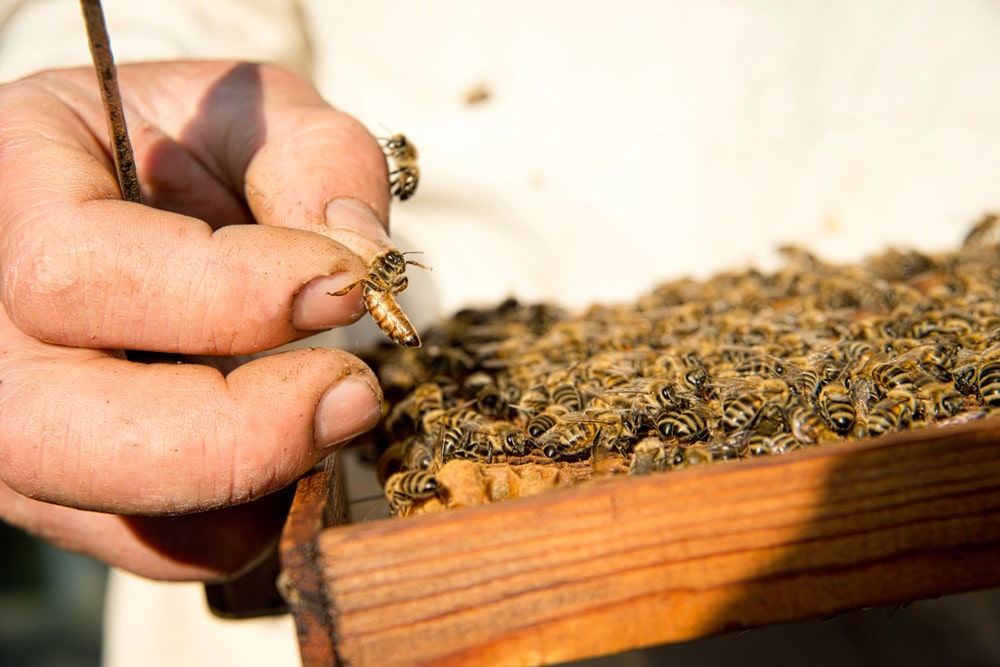
With your fingers. This is the method of experienced breeders and comes down to three moves:
- Pick the queen up by her wings. Never by the abdomen.
- Place the index finger of your other hand under her legs and your thumb on her thorax.
- Hold her gently by the thorax, between thumb and index finger, and apply the drop of paint.
What precautions to take when marking a queen
- Paint only the thorax. Never the head, eyes, antennae, wings or abdomen, nor the sides, where the spiracles she breathes through open. Paint on the head is the most serious mistake.
- Don’t pick her up by the abdomen or squeeze it with the cage.
- Be wary of the first drop. Almost every marking that goes wrong is down to a pen that wasn’t primed.
- Don’t release her with wet paint. The smell can make the workers harass her, and the mark also smudges or comes off. The same goes for discs: they turn up on the hive floor within a few days.
- Hands free of strong smells and paint made for the purpose.
- Release her slowly. A queen that dashes across the comb unsettles the workers. Let her walk from the cage onto the frame.
- If she runs about nervously and won’t let herself be caught, don’t persist. Put the frame back, close up and try another day.
- If you are also going to clip her wing, do it before painting, so you don’t get wet paint on the clipping scissors, her wings or her legs.
- If you mark a lot of queens or work alone, a QueenSafe handling bag stops a queen flying off in the apiary.
What to do if something goes wrong
The paint lands outside the thorax
It’s usually down to an unprimed pen or too much pressure. If the paint is water-based and still wet, carefully remove the excess. Let her dry in the cage and keep an eye on that hive at the next inspection.
The workers pile onto her when you release her
This is balling: the workers form a ball around the queen and can kill her. The first thing is to protect her. Retrieve her without forcing the ball apart with your fingers, separating the workers with a little smoke or a fine spray of water, and put her in a cage.
Then watch how the workers react before releasing her again. If they are still hostile, give her back to the colony in a cage with queen candy, as you would when introducing a new queen. The possible causes are paint that is still wet and an abrupt release, so waiting for it to dry and releasing her calmly reduces the risk.
You see no eggs a few days later
Laying can stop for a while after handling, or the queen may have been lost. Don’t intervene yet. Look again after a week: if there are eggs, all is well; if there are emergency queen cells, the colony has given her up for lost.
The queen falls or flies off
Stay still and look at the ground before moving your feet. If she has flown, don’t chase her: wait a few minutes beside the open hive, because a queen that has already been out to mate knows her hive and often returns to the spot she left from. There’s no guarantee she will come back, so close up and confirm it a week later by looking for eggs.
Is it better to mark a queen with paint or a numbered disc?
It depends on what you want to know. Paint tells you the year. A disc also tells you which queen she is.
| Paint | Numbered disc | |
|---|---|---|
| What it tells you | The year of birth | The year, by the colour, and the individual queen, by the number |
| What you need | A marking pen or marking paint and a cage | Discs, glue, applicator and a cage |
| Difficulty | Low | Somewhat higher: the disc measures 2.5 or 3 mm and the glue has to set |
| Best for | Production apiary: age and changes of queen | Rearing and selection: tracking each queen in your records |
Numbered discs make sense for the most precise marking, such as that used in genetic selection. If you only want to see her age and spot a change of queen, paint is enough. For numbering there is the Opalitki numbered disc kit, which includes the five colours, the glue and the applicator, and the ApiDana magnetic numbered discs, which are fixed with a shellac glue sold separately. Always use the glue intended for your disc system.
A disc is applied just like paint, with two differences: first a tiny amount of glue goes on the centre of the thorax and then the disc on top, and you have to wait for the glue to set before releasing the queen.
Frequently asked questions
What colour do you mark a queen bee?
The colour for her year of birth, according to its last digit: white for years ending in 1 and 6, yellow for 2 and 7, red for 3 and 8, green for 4 and 9 and blue for 5 and 0. Queens born in 2026 are marked white and those born in 2027, yellow.
Can you mark a virgin queen?
You can, but it isn’t advisable. The mark is usually lost on the mating flights and a marked virgin is more likely to be rejected on introduction. It’s better to mark her once she is laying.
How long does the paint take to dry?
With a water-based paint pen, from one to a few minutes. Marking paint with a brush takes a little longer. Keep the queen held, without pressure, until the paint no longer smudges.
Where on her body do you mark the queen?
On the centre of the thorax, on top, between the wings. Never on the head, wings or abdomen.
What should I do if the mark wears off?
An unmarked queen is a sign of a change of queen, not proof. Note down a possible replacement and check your hive records. If you confirm she is the same queen, mark her again in the colour of her year of birth.
Is marking a queen the same as clipping her wing?
No. Wing clipping stops the queen flying off with a swarm, but it doesn’t stop the colony swarming. Some breeders clip the right wing in even years and the left in odd years, so it also serves to tell her age. Under EU organic rules, wing clipping is not allowed.
Further reading
- How to find the queen bee, and when you do not need to
- The queen bee: what she does, how to recognise her and how long she lives
- Queen cell, virgin queen or mated queen: which to introduce and how
- Queen rearing: a step-by-step guide to get started
Main source: Gilles Fert, Cría de reinas, the 2019 Spanish edition of L’élevage des reines, pp. 84-85 and rearing calendar. Handling details checked against The Apiarist, Honey Bee Suite and the University of Florida queen handling guide.


