
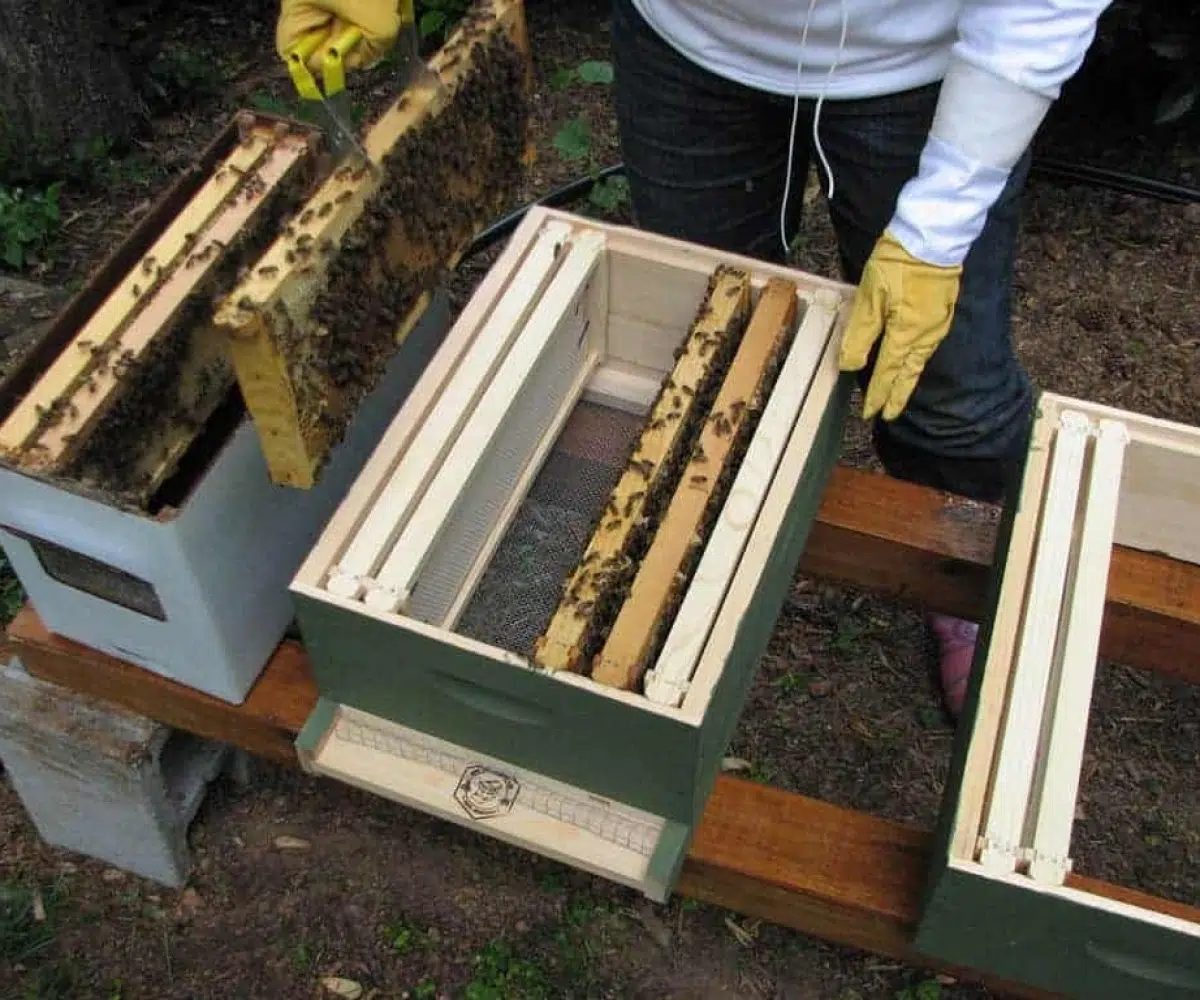
Making nucleus colonies helps you expand an apiary and replace losses. The aim is to produce viable new colonies without weakening the donors excessively. Two basic options are to let the queenless split rear its own queen—a walk-away split—or introduce a mated queen. The waiting time, cost and risks differ.
Two methods compared
| Method 1: walk-away split | Method 2: mated queen | |
|---|---|---|
| Queen supply | The queenless unit rears its own | A purchased or home-reared laying queen |
| Brood frames | Typically 2–3; include eggs or very young larvae | Typically about 2; brood stages depend on introduction protocol |
| Stores | Often 2 frames of honey and pollen | 1–2 frames, adjusted to conditions |
| Time until laying | Often about 25–30 days; weather can delay it | Usually shorter, after successful acceptance and release |
| Main risk | Queen rearing or mating fails | Queen is rejected or not successfully released |
| Laying check | Usually around 3–4 weeks after a walk-away split | Commonly around 7–10 days; follow the breeder’s protocol |
| Main advantage | No purchased queen required | Shorter brood break and a selected queen source |
In this guide
- choosing a donor and frames;
- making a walk-away split;
- introducing a mated queen;
- positioning or moving the nucs;
- checking for eggs.
Apiary increase is not only about raising colony numbers: replacement nucs can provide a reserve after winter losses or queen failure. Losses vary greatly with location, season, health and management. Do not treat a fixed annual loss percentage as inevitable; investigate losses and plan replacements around your own records.
Choose a healthy, well-populated donor colony with enough brood and adult bees to support the split and recover afterwards. Around eight well-covered brood frames is a practical starting point in some full-size hive systems, not a universal threshold independent of frame size or season.
Select donors for the traits you want to retain: manageable temperament, productivity, low swarming tendency and measured hygienic or disease-resistance traits. A productive colony is not automatically healthy. Check brood and stores before moving anything, and never spread suspected infection by making up nucs from affected hives.
Before you start: donor colony and frames
Choosing the frames
For a queenless nuc that will rear its own queen, a common arrangement is two or three brood frames, including eggs or very young larvae and at least one frame of sealed brood, with sufficient adhering bees. Add suitable honey and pollen stores—often two frames in a five-frame nuc—adjusting the layout to the box, frame size and conditions. Bees must cover all the brood.
After locating and protecting the donor queen, additional nurse bees can be shaken from suitable open-brood frames into the nuc. Check each frame carefully so that the queen is not transferred unintentionally. Leave the donor enough bees to cover its remaining brood.
Tip: brood close to emergence will soon add young workers. Choose healthy sealed brood with workers visibly starting to emerge where possible; dark cappings alone do not reliably tell you its age or health.
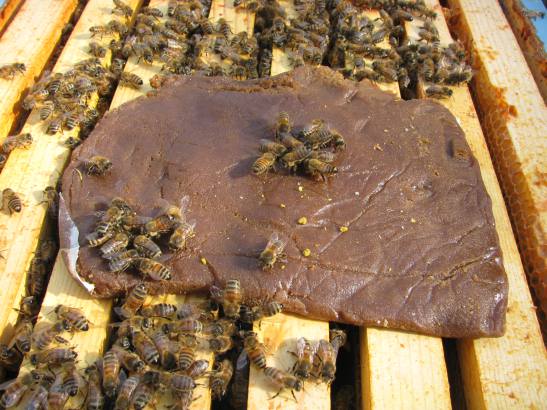
Assess the nuc’s food supply as well as the frames of stores. Suitable liquid carbohydrate feed, including formulations sold as Beecomplet or Apimix, supplies energy; protein patties such as Ultra Bee or Apinúcleo serve a different purpose. Use products appropriate to the season and actual shortage, following their instructions. Carbohydrate syrup is not a substitute for pollen, and supplementation is not automatically needed when adequate forage and stores are available.
Working in hot weather
In hot weather, work during a cooler part of the day and keep newly made nucs shaded and well ventilated. Some handling methods use a light mist of clean water to reduce running, but do not soak the bees or brood. Avoid excessive smoke and heat build-up, especially in closed transport boxes. Shade and ventilation matter more than treating water spraying as a universal requirement.
Method 1: a walk-away split
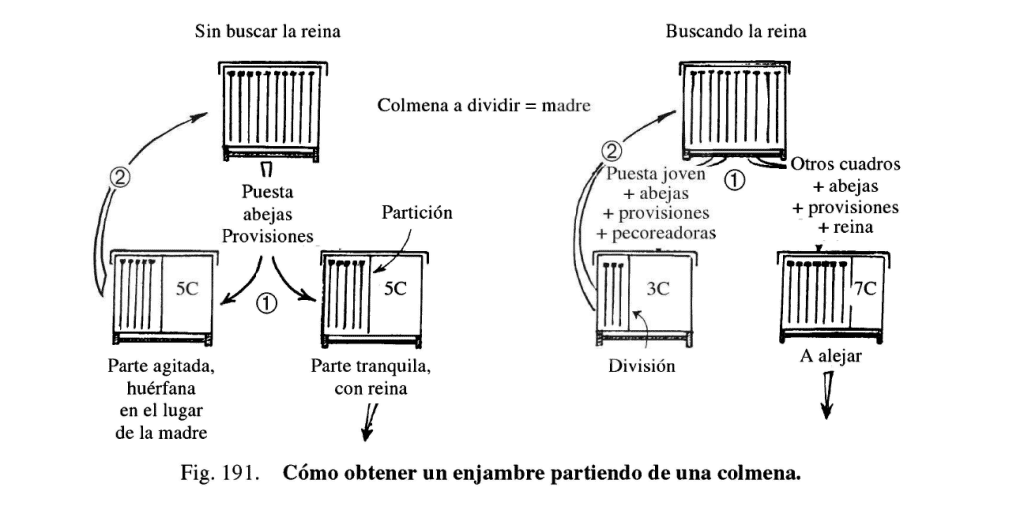
A walk-away split leaves a queenless portion to rear a queen from its own brood. Ensure that the queenless unit has eggs and very young larvae, preferably newly hatched. If you have not found the queen, both portions need suitable young brood because either could be queenless. Finding her first makes the outcome easier to manage.
The workers select young larvae and build emergency queen cells. A new queen may be laying around 25–30 days after the split, but this is an estimate, not a deadline. Emergence depends on the age of the brood selected; mating then depends on suitable weather and mature drones. Do not assume that every colony follows an exact twelve-day cell-building stage.
The split can be made with or without locating the queen, but locating her is preferable. Record which unit retains her and which must rear a replacement. The original diagram below retains its Spanish labels: the left-hand example divides without finding the queen; the right-hand example separates a queenless unit containing young brood from the queenright portion. “Madre” means donor colony, “cría/puesta” brood, “provisiones” stores and “pecoreadoras” foragers.
Allocating returning foragers
A nuc needs enough nurse bees for brood care, while returning foragers may fly back to the donor’s original position. This redistribution can leave a newly moved nuc much weaker than it looked when assembled. Check bee coverage and stores after the flying bees have redistributed; do not assume the original balance will remain unchanged.
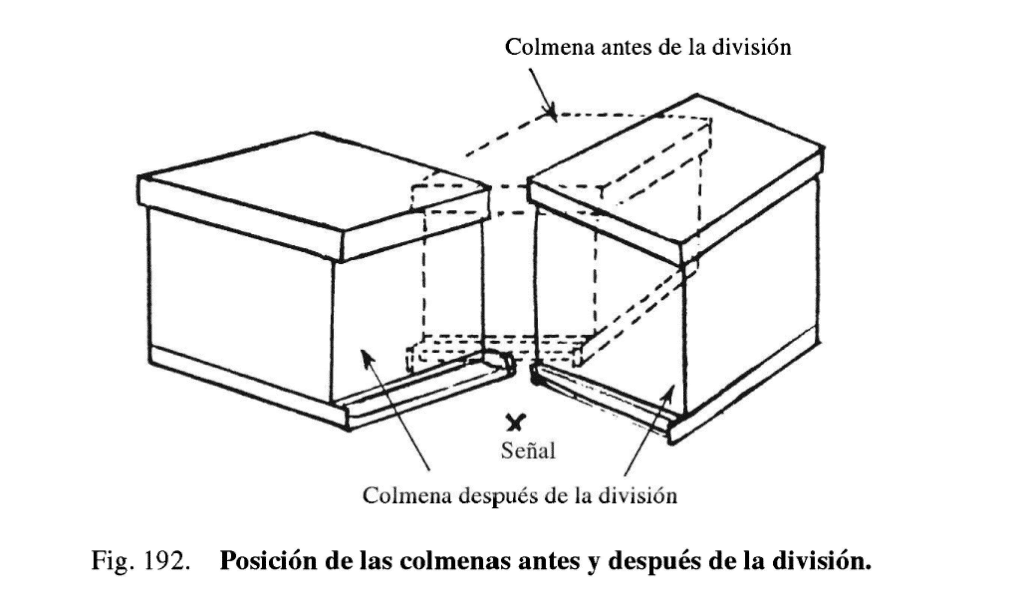
One way to allocate returning foragers is to use the donor’s former position for the unit that needs them. Plan the move deliberately: putting a nuc immediately in front of an occupied entrance is not a guarantee of an even division and can obstruct traffic. Watch both units and correct an obvious imbalance without spreading unhealthy brood or bees.
Another arrangement places the two units close to the old stand with entrances angled towards the former flight approach, sometimes at roughly 90 degrees to one another. A strong colony may also support a fan arrangement of several nucs, but only if each has enough bees, brood and food. The original diagram below shows the former hive position in broken lines and the new boxes on either side; “señal” marks a reference point. Its printed labels remain in Spanish.
Method 2: a nuc with a mated queen
Introducing a mated, laying queen normally shortens the brood break compared with waiting for a queen to emerge and mate. The queen may be purchased from a breeder or reared in your own programme. Prepare a genuinely queenless unit and choose an introduction method appropriate to the queen, cage and colony.
A practical small nuc can contain roughly two brood frames and one or two frames of honey and pollen, with ample young workers. The balance of open and sealed brood depends on the introduction protocol: Penn State’s protocol for a laying inseminated queen, for example, uses mainly sealed and emerging brood. Frame counts are a guide; enough bees to cover and warm the brood is essential.
Open brood is not compulsory in every mated-queen introduction method. Eggs and young larvae allow workers to start emergency queen cells, which can compete with the introduced queen. Follow one coherent protocol and check for competing cells; do not remove the queenless unit’s only route to a queen unless the planned replacement is available.
Queen acceptance depends on more than colony size. A small unit rich in young workers can be easier to requeen, but its population still needs to be viable. Queenlessness, existing cells, worker age and behaviour, food and handling all matter. A strong nuc does not inevitably reject a queen, and a weak one is not automatically safe.
Bees from more than one donor are sometimes used when making up nucs, but mixing three colonies is neither obligatory nor a guarantee of queen acceptance. Only combine material from colonies whose health has been assessed, keep track of the donors and avoid transferring any queen accidentally. Using more donors also creates more opportunities to spread disease.
Introducing the queen
Allow the unit to become queenless for the period specified by the chosen introduction method, commonly around a day or two for caged-queen routines. Do not treat mated queens, virgin queens and queen cells as interchangeable. Mixing bees is not a reason to bypass the cage or assume immediate release is safe. Resolve competing queen cells and check the bees’ response before allowing release.
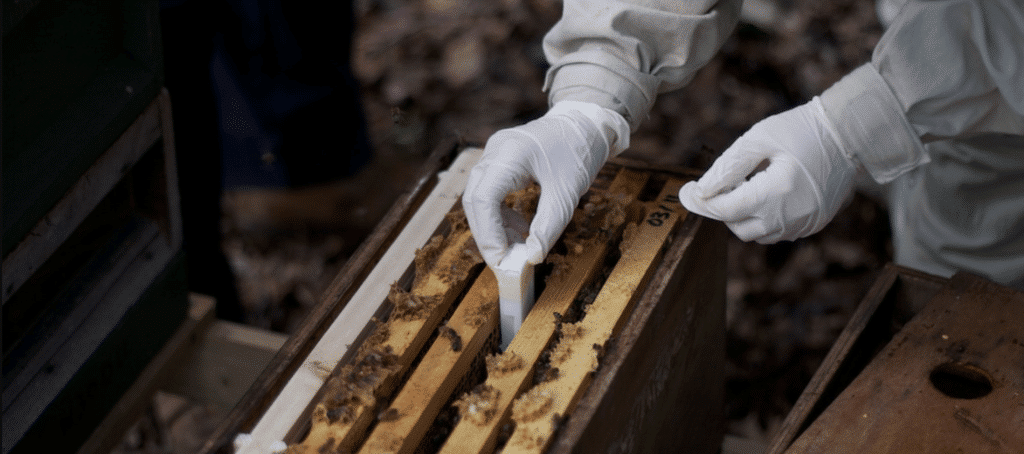
Advice about removing attendant workers varies with the cage and introduction method. Follow the breeder’s instructions rather than assuming attendants must always stay or always be removed. If removal is required, use a safe, enclosed handling procedure: losing or injuring the queen creates a much larger problem.
For a candy-release cage, prepare the correct exit as directed and secure the cage among the brood frames so workers can reach its mesh and feed the queen. Cage orientation is design-dependent; do not automatically place every cage upside down. Do not pull out the candy and directly release a queen into hostile bees. The Scottish Beekeepers’ Association introduction guide illustrates different cage arrangements.
Arranging the nucs
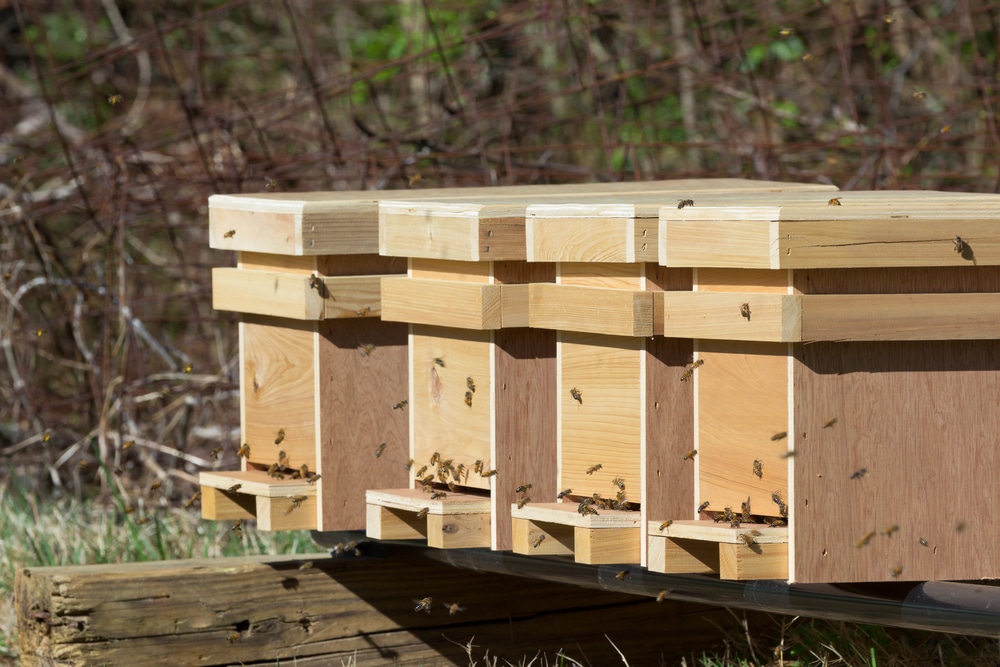
Avoid a long, identical row of nuc hives where possible. Vary entrance direction and provide clear landmarks to help bees identify their own unit. The photograph earlier in this article illustrates nuc boxes, not an ideal layout for every site.
Distinctive positions are particularly helpful for mating nucs with virgin queens. Spacing of about two metres or more where practical, varied orientation and landmarks can reduce confusion, but no single spacing guarantees a queen’s return. Keep access clear for inspection and avoid exposing neighbours or paths to flight lines.
After transport, open entrances when the units are safely positioned and conditions permit, often towards evening when flight activity is reduced. Do not leave living colonies sealed in heat while waiting for a preferred opening time. Use suitable ventilation throughout transport and confinement, then check that entrances are clear and nucs have not become badly unbalanced through drift.
Feeding and building up the nuc
Maintain adequate food during queen establishment. Offer appropriate feed when stores, weather or forage make it necessary, without spills that encourage robbing. Feeding supports colony nutrition; it does not guarantee acceptance or successful mating, and routine protein feeding is not required in every situation.
Once the queen is accepted and laying, the nuc can be reinforced with healthy emerging brood if that fits the season and your aims. Add only as much brood as its bees can cover and care for. Reassess food and space as the population grows rather than automatically adding more frames and feed.
Other methods
These are two basic approaches, not the only ways to increase an apiary. Beekeeping manuals, including Jean-Prost’s work, describe fan, Provençal, double-fan and other arrangements. Each redistributes queens, brood and flying bees differently; understand the complete sequence before combining parts of different methods.
For more detailed study, explore our beekeeping books. Check the language and edition of the individual book: an English shop page does not mean every title is written in English.
Where to place the new nucs
A compulsory ten-kilometre move is not a universal rule for making nucs. Moving to a genuinely separate foraging area can help retain flying bees, but same-apiary splits are also possible with an appropriate allocation of queens, brood and foragers. Choose the method before deciding where each unit will go.
Bees that have already oriented may return to the previous stand after a short move. The effect depends on landscape, forage and the bees present; a single distance does not guarantee that every worker stays or returns. Plan for this loss of flying bees and verify that the remaining population can cover the brood.
Our guide to moving beehives provides further practical context. Treat distance advice as part of a complete moving method, with secure equipment, ventilation and applicable local movement requirements, not as a substitute for them.
Checking that the queen is laying
The final check is that a healthy queen is laying and the nuc has enough bees and stores. Set the inspection date according to how it was made: a walk-away split and a nuc given an already laying queen do not need the same waiting period. Record the split, cell or queen introduction date.
Season, weather and drone availability affect mating. A prolonged cold or wet spell can delay a virgin queen, so interpret the calendar alongside conditions rather than assuming a missing egg on one day proves failure.
For a unit rearing its queen, an egg check around three to four weeks after splitting is a useful planning point; around twenty days may be appropriate after some queen-cell or virgin-queen introductions, depending on their stage. Avoid repeated disturbance during mating. If eggs are absent, assess the queen’s likely age, brood history and recent weather before deciding on corrective action.
With an introduced mated queen, follow the breeder’s release and inspection schedule. A careful laying check around seven to ten days is commonly useful, but this is not an instruction to ignore a failed release or aggressive response. Confirm eggs and subsequent worker brood, not just the presence of a queen.
Frequently asked questions
When can you split a colony?
Split a healthy colony only when it has enough adult bees, brood and stores to leave both units viable. Around eight covered brood frames is a useful example in some hive systems, not a universal minimum. If a new queen must mate, suitable weather and mature drones must also be available.
What is a walk-away split?
It is a queenless split left to rear its own queen from eggs or very young larvae. If the donor queen has not been located, both portions need suitable young brood. Finding and allocating her first makes the outcome easier to manage.
How long before a colony-reared queen starts laying?
About 25–30 days after a walk-away split is a useful estimate, but brood age, emergence, weather and mating conditions can change the timing. It is not a guaranteed deadline or a fixed twelve-day cell-building process.
How far should new nucs be moved?
There is no universal ten-kilometre minimum. A remote site can help retain foragers, while a planned same-apiary split can also work. Account for bees returning to their former stand and check that the nuc still has enough workers to cover its brood.
Must bees from several colonies be mixed?
You do not have to. Mixed-donor nucs are one approach, not a guarantee of acceptance or a reason to release a queen immediately. Only use healthy donors, keep records and avoid spreading infection or transferring an unnoticed queen.
When should you check for eggs?
For a walk-away split, plan an egg check roughly three to four weeks after division. Timing after a queen cell or virgin queen depends on its stage. For an introduced mated queen, follow the breeder’s protocol, commonly checking laying around seven to ten days. Adapt to the actual release and weather history.
Do newly made nucs always need feeding?
Check stores and forage and feed when necessary to prevent a shortage. Carbohydrate feed and protein supplements have different purposes; use a suitable product only where needed. Feeding does not guarantee queen acceptance or mating and must not provoke robbing.
Further reading
- Queen introduction (English PDF): a separate guide to cages and introducing queens.
- An introduction to queen rearing: background if you want to rear your own.
- Moving beehives: plan the whole move, not just its distance.
- Farrar’s rule: consider the effect on colony strength before making too many splits.

ISNI 0000 0005 1801 1100 | Joshua Ivars is the manager of LA TIENDA DEL APICULTOR and the author of this blog, where he shares technical and practical guidance for beekeepers. Drawing on extensive experience in the beekeeping sector, he offers advice and solutions based on beekeepers’ real needs, sharing his knowledge of equipment and essential beekeeping practices.


